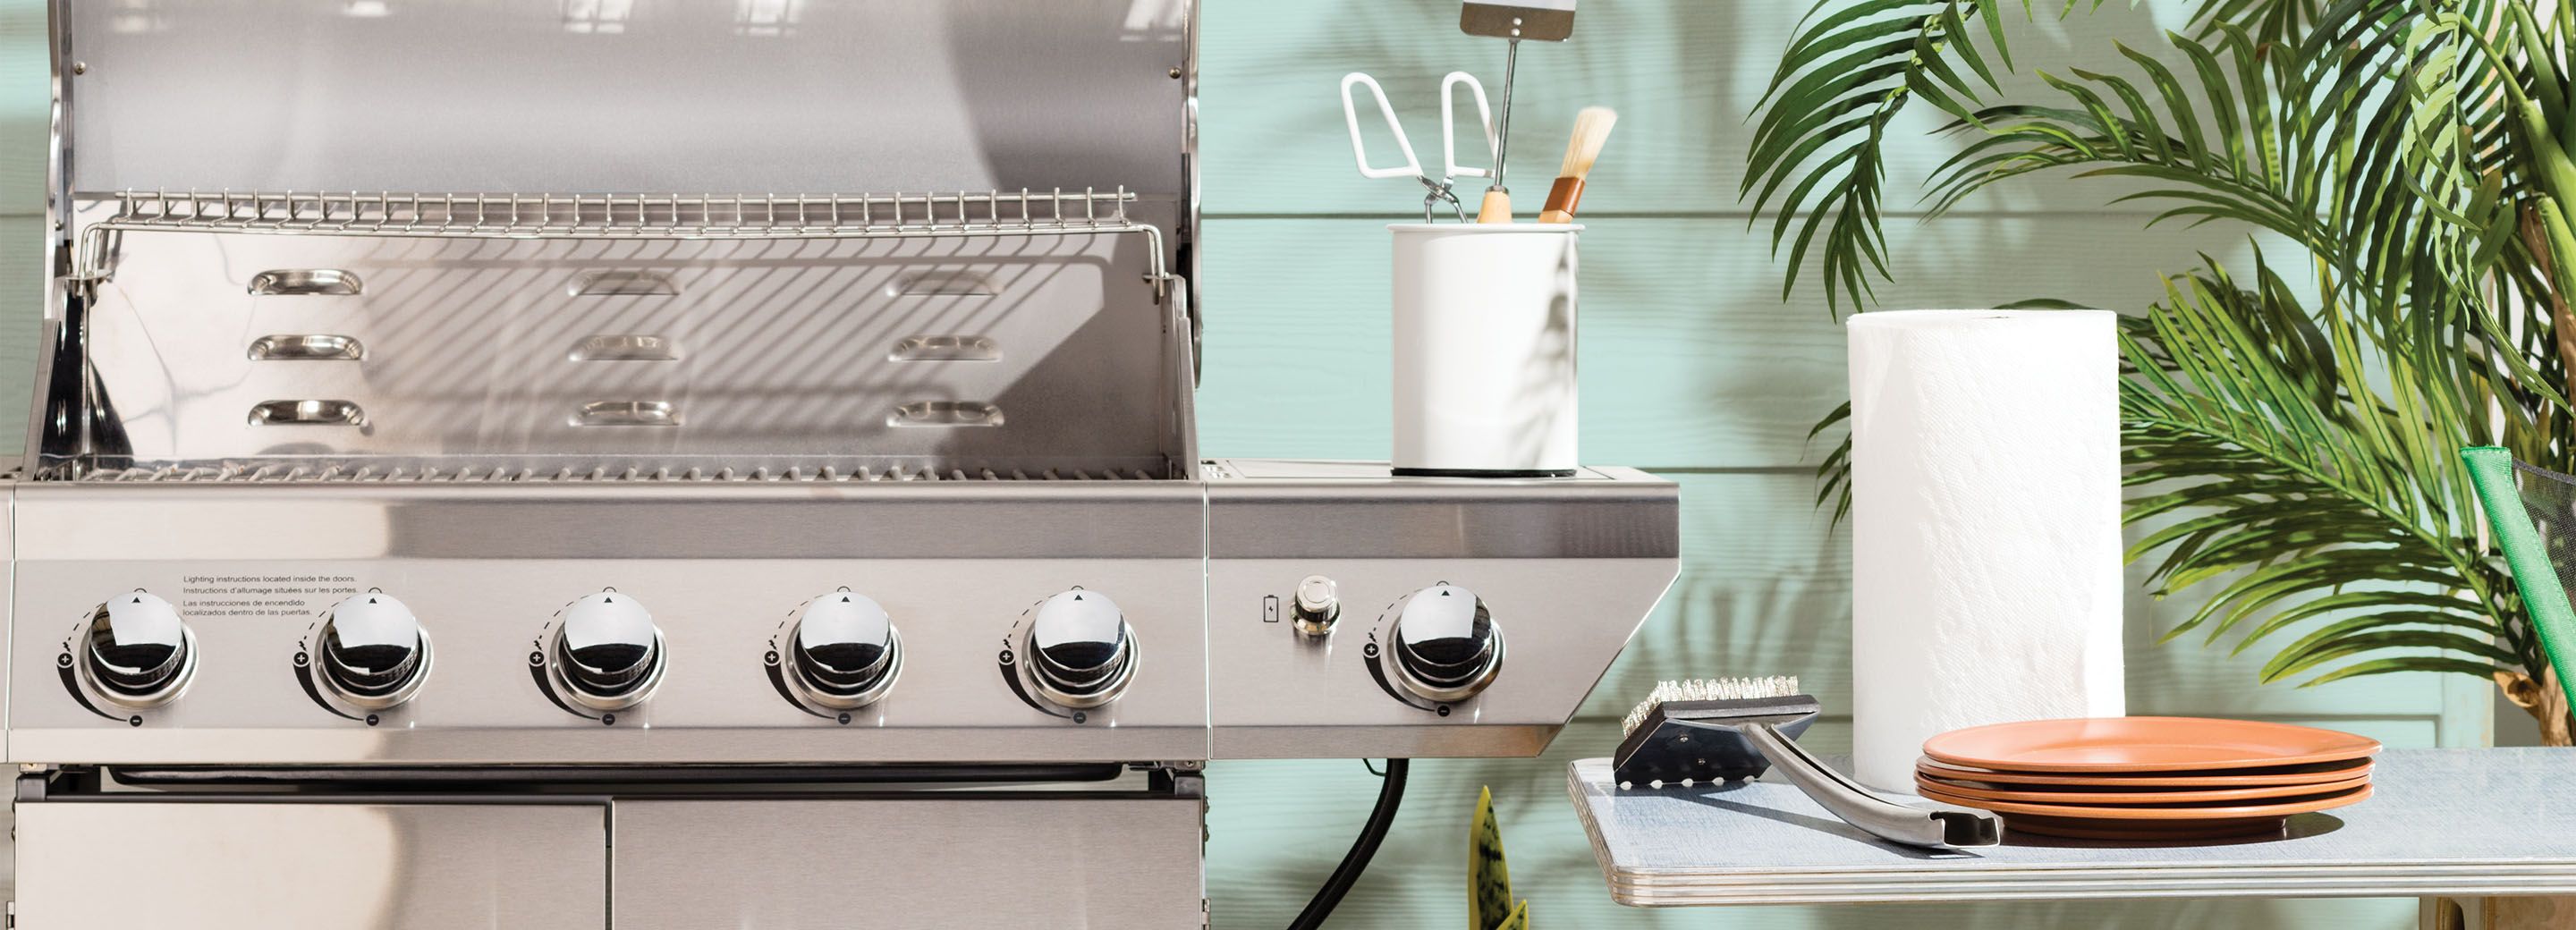
Prepare Your Space
Set yourself up for success with an improvised outdoor kitchen so everything you need is at your fingertips.
- Set up a small prep table next to the grill so you have a place for food that’s “on deck” and an easy landing spot for it once it’s done.
- Store all your food in a cooler close by to avoid multiple trips in and out while cooking.
- Keep a small trash can next to you for easy disposal of food packaging.
What’s Better, Propane or Charcoal?
It all comes down to preference, though each option has pros and cons to consider.
Propane
Quicker Start-Up Time
Just turn the knob on the propane, crank the dials and you’re good to go! No waiting around for coals to get hot.
Easier Clean Up
Give the grates a good brushing and wipe them down with a wet rag —no ashes to deal with. But don’t forget to turn off the propane when you’re done.
More Fuel-Efficient
A 20-pound propane cylinder can provide about 18-20 hours of cooking time, whereas a 20-pound bag of charcoal will only yield three grilling sessions.
Charcoal
Easier on Your Wallet
Charcoal grills cost significantly less than gas, making them the economical choice for beginners.
Hotter Than Hot
A charcoal grill filled with red-hot coals can reach 700°F, allowing you to achieve the perfect sear on any meat.
More Flavorful
When drippings from your meat and veggies fall onto the hot coals, those flavors infuse the smoke that goes right back into your food.
Propane & Charcoal Tips
Propane
Find the Hotspots
Set your grill on medium-high heat and place a single layer of sliced bread across the entire surface. Cook for 90 seconds then turn off the grill. Flip the slices over in the order they were placed. The less charred areas are the best places to position your more delicate cuts of meat.
Check Your Propane
Pour a glass of hot water down the side of your propane tank and feel it with your hand to find the point where it changes from hot to cold. The cold area indicates the level of propane left in the tank.
Charcoal
Ditch the Fluid
Never use gasoline or lighter fluid to light your charcoal—it’s dangerous and not the flavor profile you want to infuse your steak with. Instead, opt for a chimney starter.
Make Clean-Up A Breeze
It’s important to clean the ashes out of your charcoal grill after each use. Rather than hauling the grill over to a good dumping spot, keep an ash bucket and shovel close by. Once the grill has cooled down, remove the grate and shovel out the ashes before wiping the inside clean.
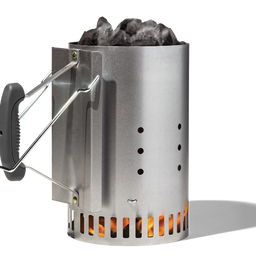
How To Use a Charcoal Chimney
Fill the chimney with charcoal and place it on top of the grill grate. Fill the separate lower section of the chimney with newspaper and light it. Let it burn for 10–15 minutes, until you start to see flames poking through the top of the charcoal.
Carefully pour the coals into the base of your grill and cover with the grate. Once the coals are white, you’re ready to grill!
Gather Your Tools
The most important item in your grilling arsenal is a wire-bristle grill brush. You always want to start a grill-sesh with clean grates! To avoid greasy, stuck-on bits, give the grill a good brush each time you’re done grilling while it’s still hot. This way, you’ll have a clean grill that’s ready to go for next time.
DIY Grill Brush
No grill brush, no problem. A disposable aluminum foil ball will quickly rub the grit off of your grates just as easily. Simply roll a sheet of aluminum foil into a compact ball. Secure the ball in between a pair of grilling tongs, and scrape! Be sure to wipe the grates down with a wet cloth afterward to ensure you don’t have any small, stuck-on pieces of foil.
Carton Starter
If you don’t have a chimney starter, get an empty cardboard egg carton and fill it with coals. Then, light the entire carton inside your grill. Once the embers start to emerge from the carton, add some additional coals on top; you’ll be ready to grill in no time!
Spray Bottle
You can also keep a spray bottle filled with water handy to extinguish any flames that get out of hand. This method allows you to dampen flare-ups without compromising temperature.
Other Tools You'll Need
- A good pair of tongs
- A metal spatula
- Wooden or metal skewers
- A meat thermometer